The SAP IDoc Technology
In this month we will continue our look at SAP IDocs and the IDoc Technology by exploring IDoc extensions and enhancements.Why do We Need an Extended IDoc?
Standard SAP sends out or receives in data through IDocs using standard delivered Segments, Message Types and fields. But sometimes, these fields are not sufficient for a specific end-to-end business scenario as far as data transfer is concerned. So in such scenarios, we can add new segments with completely new structures to the standard IDoc as an extension. We create a brand new structure and insert it into existing delivered IDoc structure creating a whole new IDoc satisfying the requirement. This new IDoc is called an Extended IDoc.As an example, lets take a scenario in billing, where we already have a predefined IDoc type ‘INVOIC02’. But the requirement is to transfer an additional structure containing the fields VBRK-KTGRD (Account assignment group for this customer) and VBRK-MANSP (Dunning block). In order to fulfill this requirement, we need to create a new segment structure, add two additional fields to it, then add it as an extension to the existing IDoc Type ‘INVOIC02. Sound good? OK lets take each step in turn …..
Create a new IDoc Segment using transaction WE31
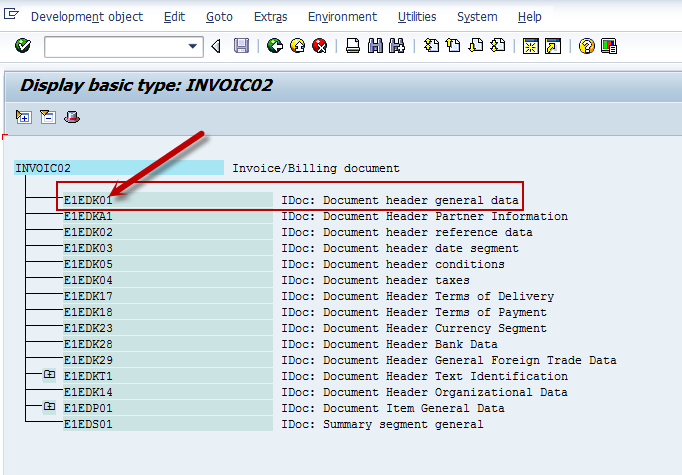
Our first task is to create a segment with the two new fields VBRK-KTGRD (Account assignment group for this customer) and VBRK-MANSP (Dunning block). In this transaction we create a segment type. This segment type has two fields KTGRD and MANSP as specified from VBRK table. This segment will be used in the final extended IDoc.Lest take a look at the standard IDoc INVOIC02 using transaction WE30. We want to add our new segment under the first header segment E1EDK01 as a CHILD segment.
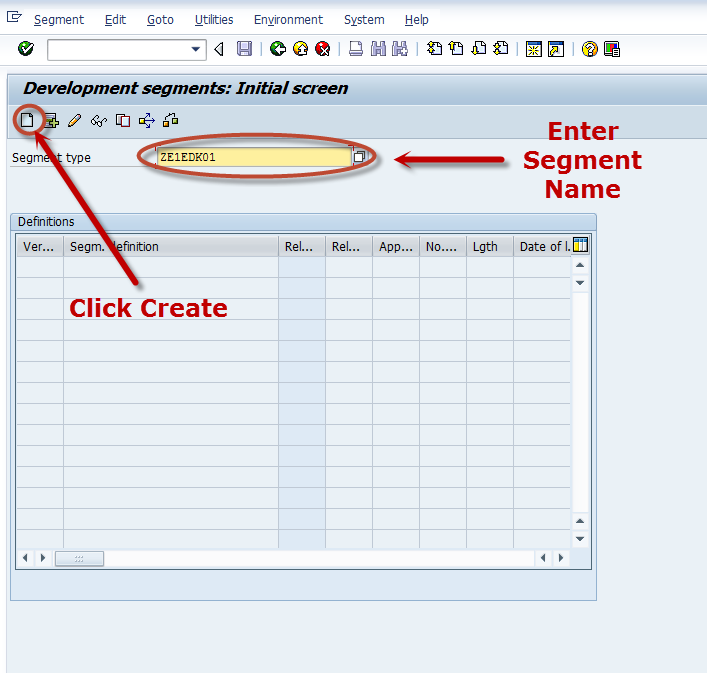
OK, now lets use WE31 to create a new Segment ZE1EDK01.
Next we enter a description, add our two new fields and hit save.
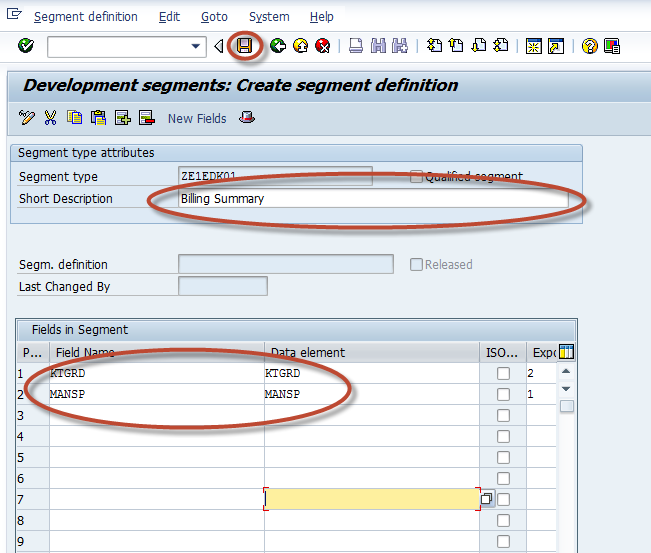
When you hit SAVE, you will get a popup as below. Just put in your User-id. The next popup will be for the transport system, for now, lets just make this a LOCAL OBJECT.

At this point we can RELEASE the segment by following the menu path below. If for some reason you need to change the segment after it has been released, go back and cancel the release and make your changes.
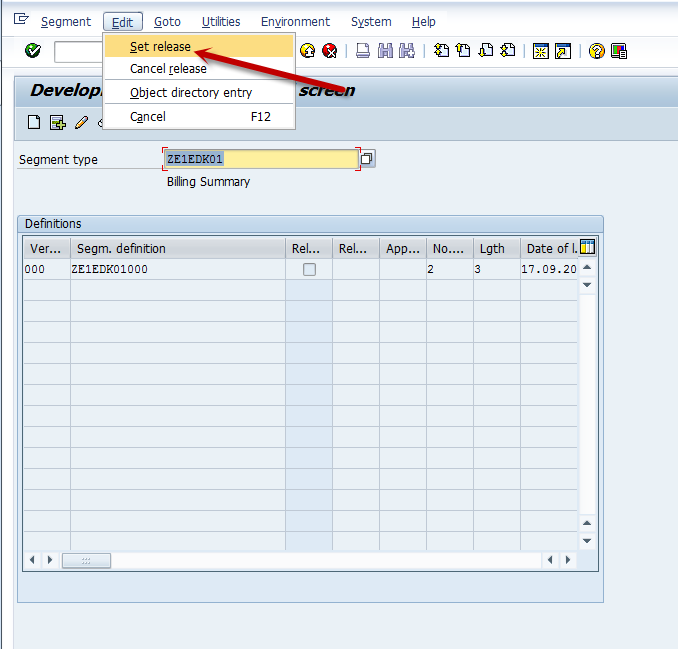
Create a new IDoc Type (Extension) using transaction WE30
Now we can use transaction WE30 to create the new Extension Type ZINVOIC02. Fill in the Obj. Name and hit CREATE.Please be sure to mark the new IDoc type as an extension!

When you hit the CREATE button, a new popup screen will appear. Fill in the description and enter the IDoc Type we want to extend and hit the GREEN Check.
For us this will be INVOIC02.

You will get a screen showing our extension ZINVOIC02 and a set of segments belonging to the standard IDoc INVOIC02. Since the extension has VBRK-KTGRD and VBRK-MANSP and they belong to “HEADER” tab in SAP Billing transaction VF02 the extension is done for the relevant segment type E1EDK01 related to “Header General Data”. Click on the E1EDK01 Segment to place focus on that segment and click the create button.
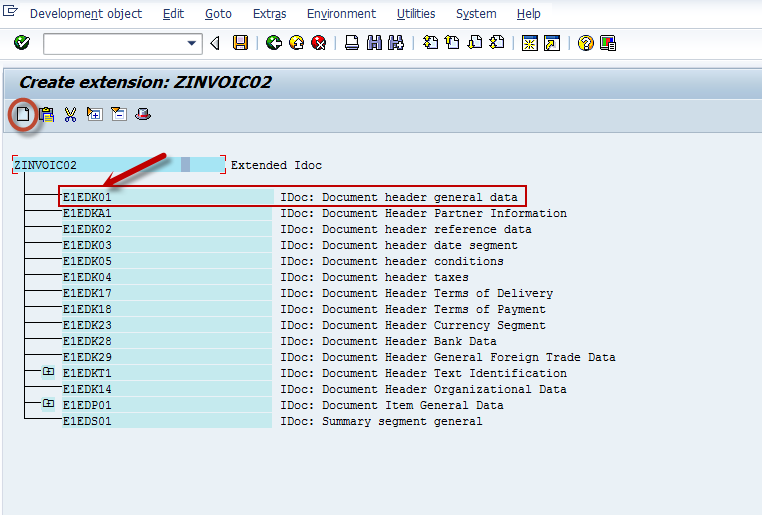
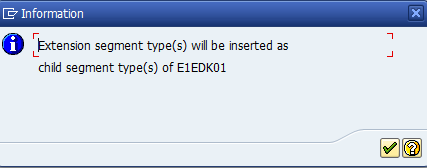
When you hit the CREATE button, yet another new set screens will appear. The first Pop-Up is information only and you can ENTER past this. You will see our new segment will be a CHILD segment to the PARENT segment E1EDK01.
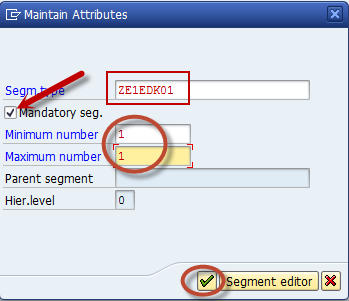
The next screen is for identifying our new segment we created way back using transaction WE31, and, maintaining the attributes for the new segment. The attributes include whether it is a mandatory Segment. The Maximum and minimum numbers specify the number of times the segment can be repeated in sequence. The Hierarchy level suggests the parent/child relationship. Segments which have a parent segment (like ours) have a hierarchy level which is one higher than that of their parent.
We will use our new custom Segment ZE1EDK01, set it to mandatory, and use a minimum and maximum of 1. Enter these values and click the GREEN check button.
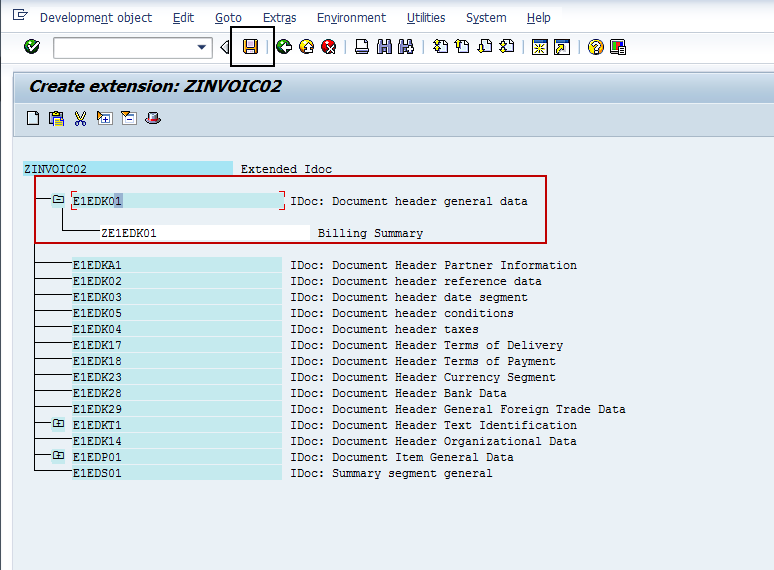
Almost there! Now after you hit the GREEN check, you will have the distinct privilege of seeing the result of your hard work. The actual Extension Type with our new segment shown. All we need to do now is hit the SAVE button. Again, for our purposes we will make this a LOCAL object so no transports are necessary.
The last and final step is set the RELEASE flag on this extension. Once you have done this the IDoc Extension is ready to use!

Summary
So in summary, we needed a IDoc Type that was different than the delivered IDoc Type of INVOIC02. We needed to add new fields. We achieved this by creating a custom segment, adding our fields to it, then inserting into the delivered IDoc Type as a NEW IDoc Extension.To read the part 1 of the Blog click HERE
To read the part 2 of the Blog click HERE
In the next part of this blog series we will take a look at how we can use this new IDoc Extension. Create a custom Message Type, assign this to our New IDoc Extension and configure the Partner Profile.
Fonte: https://itpsap.com/idocs-guide-developers-part-3/
Nenhum comentário:
Postar um comentário